
The proxy server allows us to set the correct location for our PC without revealing its true location. It can help us to get to the closed resources to get the necessary information. To achieve these goals, you need to be able to modify proxy servers. This is especially important for sources with limited access to a single IP. How to change the proxy, consider below.
Table of Contents

Change proxies in Google Chrome browser
To change proxies in Google Chrome, you generally have a few options. Here’s a step-by-step guide:
Using Chrome Settings
- Open Google Chrome: Launch the browser on your computer.
- Access Settings: Click on the three dots in the upper right corner to open the menu, then select “Settings.”
- Advanced Settings: Scroll down and click on “Advanced” to expand more settings.
- Open System Settings: In the advanced section, find and click on “System.”
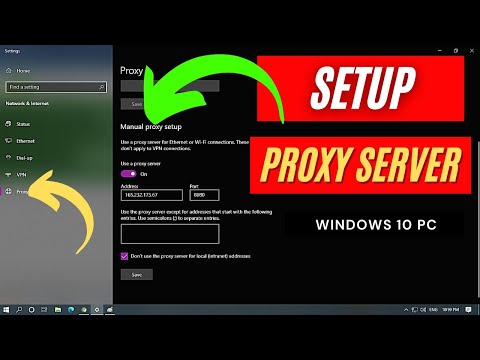
- Open Proxy Settings: Click on “Open your computer’s proxy settings.” This will open the proxy settings on your operating system.
Windows Proxy Settings
- Proxy Settings: On Windows, this will open the Internet Properties dialog. Go to the “Connections” tab, and click on “LAN settings.”
- Adjust Settings: Here, you can set up a proxy manually or use an automatic configuration script.
macOS Proxy Settings
- Network Preferences: On macOS, this will open the System Preferences for Network.
- Advanced Settings: Choose your network and click on “Advanced,” then navigate to the “Proxies” tab.
- Configure Proxies: You can select and configure the proxy type needed.
Using Chrome Extensions
- Chrome Web Store: Visit the Chrome Web Store and search for proxy extensions.
- Choose an Extension: Select a proxy extension and add it to Chrome.
- Configure Extension: Once added, click on the extension icon in the browser toolbar and configure the proxy settings as per the extension’s instructions.
Change proxies in Yandex browser

Changing the proxy settings in Yandex Browser is similar to other browsers, as it usually involves adjusting your system’s network settings or using browser extensions. Here’s how you can do it:
Using System Proxy Settings
- Open Yandex Browser: Start by launching the Yandex Browser on your device.
- Access Browser Menu: Click on the three horizontal lines in the upper right corner to open the browser menu.
- Go to Settings: Select “Settings” from the menu.
- Advanced Settings: Scroll down in the settings and click on “Advanced.”
- Open System Proxy Settings:
- In Windows, click on “Open your computer’s proxy settings” to open the network settings where you can configure your proxy.
- On macOS, this option will direct you to the Network preferences in System Settings where you can configure the proxy.
- Configure Proxy:
- For Windows: This will open the Internet Properties window. Go to the “Connections” tab, and then to “LAN settings” where you can set up a proxy server.
- For macOS: In the Network preferences, select your network, click on “Advanced,” and navigate to the “Proxies” tab to set up your proxy.
Using Browser Extensions
- Find Proxy Extensions: You can add proxy extensions to Yandex Browser from the Chrome Web Store, as Yandex is compatible with Chrome extensions.
- Install Extension: Choose a proxy extension and add it to your Yandex Browser.
- Configure Proxy Through Extension: After installation, click on the extension icon in the browser toolbar to configure your proxy settings as per the extension’s instructions.
Change proxies in FireFox browser

Changing the proxy settings in Mozilla Firefox is a straightforward process. Here’s how you can do it:
Steps to Change Proxy Settings in Firefox
- Open Firefox: Launch the Mozilla Firefox browser on your computer.
- Access Options: Click on the three horizontal lines in the upper right corner to open the menu. Select “Options” (or “Preferences” on some versions).
- Go to Network Settings:
- Scroll down to the “Network Settings” section near the bottom of the page.
- Click on “Settings” under this section.
- Configure Proxy Settings:
- In the “Connection Settings” window, you’ll see several options:
- No Proxy: Firefox will use your network’s direct connection to the internet.
- Auto-detect Proxy Settings for this Network: Firefox tries to detect the proxy settings.
- Use System Proxy Settings: Firefox uses the proxy settings defined in your system’s network preferences.
- Manual Proxy Configuration: Here, you can manually enter proxy information like HTTP Proxy, SSL Proxy, FTP Proxy, etc.
- Automatic Proxy Configuration URL: Use this if you have a PAC file URL that automates the proxy setting process.
- In the “Connection Settings” window, you’ll see several options:
- Enter Proxy Details (if choosing Manual Configuration):
- Fill in the proxy information in the respective fields, such as the proxy server address and port number.
- You can also specify exceptions, where Firefox will bypass the proxy.
- Save Settings: Once you have configured your preferences, click “OK” to save these settings.
Change proxies in Opera browser
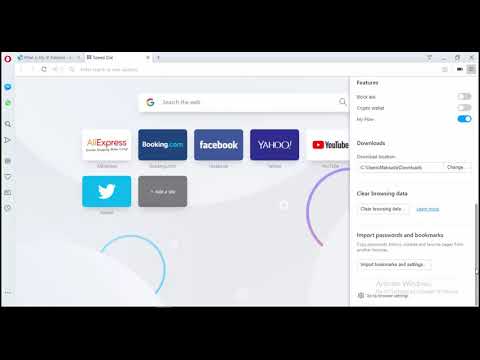
Changing the proxy settings in Opera is similar to other browsers, often involving adjusting your system’s network settings or using browser extensions. Here’s how you can change proxy settings in Opera:
Using System Proxy Settings
- Open Opera: Launch the Opera browser on your computer.
- Access Settings: Click on the Opera menu icon in the upper left corner, then select “Settings” (or press Alt+P on your keyboard).
- Advanced Settings: Scroll down in the Settings tab and click on “Advanced” to reveal more options.
- Open System Proxy Settings: Under the “System” section, click on “Open your computer’s proxy settings.” This will redirect you to your operating system’s network settings.
- For Windows: This will open the Internet Properties dialog. Navigate to the “Connections” tab and click on “LAN settings” to configure your proxy.
- For macOS: This will open the System Preferences for Network. Choose your network, click on “Advanced,” and navigate to the “Proxies” tab to set up your proxy.
Using Opera Extensions
- Opera Add-ons: Go to the Opera add-ons store and search for proxy extensions.
- Install Extension: Choose a proxy extension that suits your needs and install it.
- Configure Proxy Settings: After installation, configure the proxy settings within the extension as per its instructions.
Note
- Opera also has a built-in VPN feature, which can be used as an alternative to proxies for certain purposes like privacy or accessing geo-restricted content.